
How to Clean a Gas Braai: Step-by-Step Guide
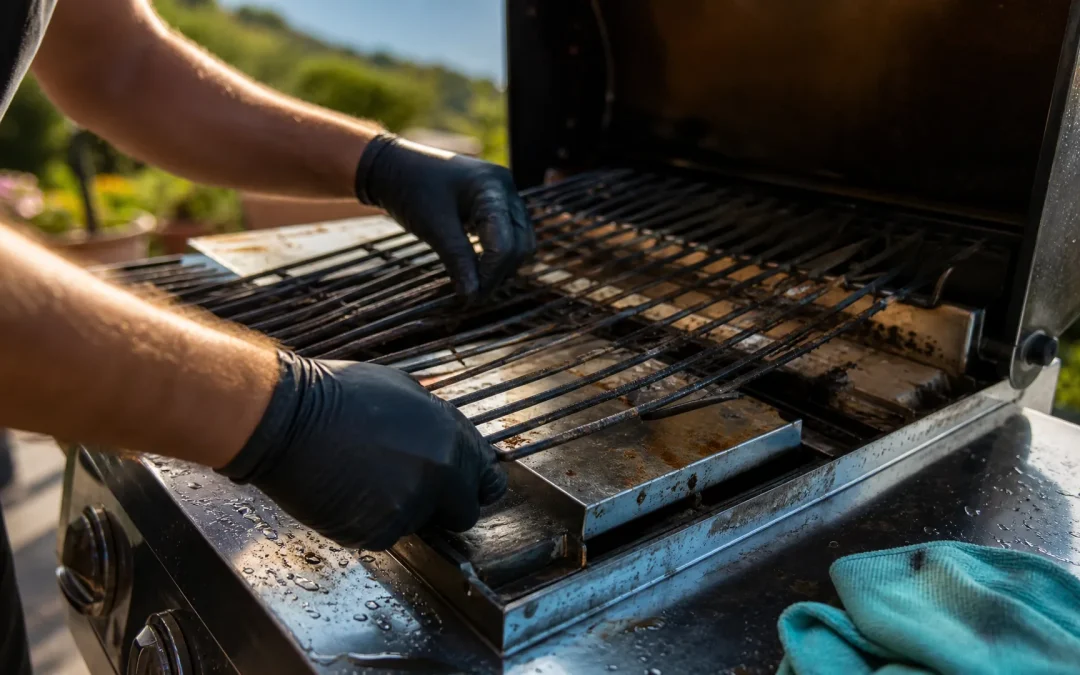
A clean gas braai isn’t just about looks. It lights faster, burns more evenly, and lasts years longer than one left to fend for itself. South African conditions make this trickier than the average international guide admits. Coastal salt air, Highveld dust, and long stretches between braais all take a toll on burners, grates, and hidden gas pathways. This guide covers how to clean a gas braai properly, with the tools, techniques, and troubleshooting steps that actually work for local conditions.
How Often Should You Clean a Gas Braai in South Africa?
Most guides say to wipe your braai down after every few uses and do a deeper clean once a season. That’s a decent starting point. South African weather changes the maths, though.
Firehouse’s product specialists recommend a full deep clean at the start and end of each braai season, plus a quick wipe-down after every third or fourth use. That rhythm keeps grease from baking onto grates and stops small rust spots before they spread.
If you live near the coast, tighten that schedule. Coastal homes in Cape Town and Durban see burner corrosion form far faster than Highveld homes, thanks to airborne salt. Salt-air households need a rust check roughly every month. Inland, dust is the bigger enemy, especially during the dry Highveld winter, when wind carries fine grit straight into open burner housings.
So how do you know which category you fall into? Treat any visible orange spotting, a lazy or uneven flame, or a musty smell from the hood as your cue to act now rather than waiting for the next scheduled clean.
Signs Your Gas Braai Needs a Deep Clean Now
Watch for these warning signs between your regular cleans:
- Flames that burn yellow or orange instead of blue
- Grease flare-ups that seem worse than usual
- Rust flakes visible on grates or burner caps
- A hood interior coated in sticky, dark residue
- Slow ignition or a burner that won’t stay lit
Any one of these means it’s time to stop delaying. Get into the deep clean, not just a wipe-down.
What You’ll Need: Tools and the Best Cleaner for a Gas Braai
You don’t need a garage full of specialist gear. A basic kit covers almost every gas braai cleaning job:
- A stiff wire brush or brass brush for burners and grates
- A degreaser suited to outdoor cooking grease, not a generic household spray
- Microfibre cloths and an old toothbrush for tight corners
- A bucket of warm water with a little dish soap
- A pipe cleaner or thin bottle brush for venturi tubes
- Rubber gloves and, ideally, safety glasses when scrubbing rust
For the best cleaner for a gas braai, look for a degreaser suited to South African braai use that’s non-caustic and biodegradable. Harsh oven cleaners can strip protective coatings off enamel grates and leave residue that smokes on next use. A milder degreaser, combined with a bit of elbow grease and the wire brush, handles baked-on grime just as well without the risk.
Avoid steel wool on stainless steel surfaces. It scratches the finish and can actually encourage rust to take hold in those tiny grooves.
Step-by-Step: How to Clean Gas Braai Burners and Grates
Start every clean the same way. Turn off the gas at the bottle, then disconnect the regulator. Never work on a braai that’s still connected to gas, even if the flame is off.
Once it’s safe, lift out the grates and remove the burners according to your braai’s manual. Most premium models let these lift out without tools. That makes gas braai maintenance far less of a chore in South Africa’s dusty, sandy conditions.
Cleaning Gas Braai Burners Without Damaging Them
Burners are the part most people damage by scrubbing too hard. The small gas ports along the burner tube are easy to enlarge or block if you’re rough with a wire brush.
To clean gas braai burners safely:
- Brush along the length of the burner, not across it, to avoid forcing debris into the ports.
- Use a soft brass brush rather than steel for stainless burners.
- Wipe away loosened grime with a damp cloth.
- Check each gas port for blockages. Clear gently with a toothpick or fine wire, never a matchstick that can snap and lodge inside.
- Let the burner dry completely before refitting.
Never submerge burners fully in water. Trapped moisture inside the tube can cause internal rust you won’t see until the braai starts burning unevenly months later.
Cleaning Gas Braai Grates and Removing Rust
Grates take the most direct abuse, so they need the most attention. Soak cast iron or enamel grates in warm water with a squirt of dish soap for about 15 minutes to loosen grease.
Then scrub with your wire brush, working in the direction of the grate bars. For rust spots, work a paste of the degreaser into the affected area with a brush. It usually lifts light surface rust within a few minutes.
For gas braai burner rust that’s gone deeper, you’ll need a rust-specific approach rather than a standard degreaser. If a grate has heavy pitting or flaking, it’s worth reading up on preventing rust on braai grates before deciding whether to restore it or replace it.
Rinse grates thoroughly and dry them completely with a cloth. Any leftover moisture invites flash rust within hours, especially in humid coastal air.
Clearing Blocked Venturi Tubes and Checking for Spider Infestations
Venturi tubes carry the gas-air mixture from the control valve to the burner. When they’re blocked, your braai lights unevenly, burns weakly, or doesn’t light at all.
Highveld dust storms in late winter and early spring can clog venturi tubes with fine particulate. That’s a common cause of uneven flames or a braai that won’t light on the first try. Insects are the other major culprit. Spiders in particular love the dark, sheltered space inside a venturi tube, especially after a braai has sat unused for weeks.
A blocked venturi tube or a spider’s web inside a burner tube is one of the most common reasons a gas braai won’t light evenly after sitting idle over winter. To clear one safely:
- Remove the burner assembly to expose the venturi tube opening.
- Use a pipe cleaner or thin bottle brush to work through the tube from both ends.
- Hold a torch to the opening and check for daylight or webbing before reassembling.
- Brush away any visible dust or debris from the tube’s exterior threads too.
Do this check every time you open up your braai for cleaning, not just when you notice a problem. It only adds a couple of minutes, and it’s the easiest way to stop a spider infestation from turning into a no-light frustration on your next braai day.
Why Your Gas Braai Won’t Light After Cleaning (And How to Fix It)
It’s a common, frustrating moment. You’ve done the deep clean, reassembled everything, and the braai still won’t light. Before assuming something’s broken, run through these usual suspects.
Misaligned burners. If a burner isn’t seated correctly over its valve orifice, gas won’t flow properly. Double-check it clicks or sits fully into place, as per your model’s manual.
Disconnected igniter wire. It’s easy to knock the small igniter wire loose while cleaning around the burner. Look for a wire that’s popped off its electrode or ceramic terminal and reconnect it firmly.
Blocked jets or ports. If you missed a clogged gas port during cleaning, gas can’t reach the ignition point in sufficient volume. Go back over each port with a fine wire.
Residual moisture. A burner that hasn’t fully dried can produce a weak, sputtering flame, or none at all. Give it another hour in the sun before trying again.
If you’ve worked through all of these and your braai still won’t light, the issue may sit further back in the gas supply rather than the burner itself. It’s worth reviewing gas braai installation safety requirements to rule out a regulator or connection fault. If you’re at all unsure, book a professional check rather than troubleshooting gas components yourself.
Seasoning Grates and Final Gas Braai Maintenance Tips for South African Homes
A deep clean strips away not just grime but also the thin protective layer that builds up on grates over time. Putting that layer back is the last, often-skipped step.
How to Season Braai Grates After Cleaning
Seasoning cast iron or enamel grates with a light layer of oil straight after cleaning helps prevent flash rust before the next braai. Use a high smoke-point oil like sunflower or canola.
- Make sure grates are completely dry.
- Rub a thin, even layer of oil over the whole surface with a cloth or paper towel.
- Heat the braai on low for about ten minutes to let the oil bond to the metal.
- Let it cool fully before covering or storing.
This one habit does more for long-term grate life than almost any other step in gas braai care.
Coastal vs Highveld Gas Braai Care Tips
Outdoor gas braai upkeep looks a little different depending on where you live.
On the coast, a breathable, waterproof cover is essential. It’s worth wiping down exposed metal weekly, too, to keep salt film from settling in. On the Highveld, covers matter as well, but the bigger habit is checking venturi tubes and burner housings more often during dusty, windy months.
Wherever you are, storing your braai in a sheltered spot, using a proper cover, and sticking to a seasonal deep-clean rhythm will keep it performing well for years. For the wider picture beyond gas-specific parts, it’s worth looking at broader braai maintenance and cleaning tips that apply across burner types.
If your braai still isn’t lighting evenly after all this, or you’re noticing rust and wear that cleaning can’t fix, it may be time to weigh up signs it’s time to replace your braai against a proper repair. And if you’re still deciding on fuel type altogether, a gas braai vs charcoal braai comparison is a useful next read.
A well-maintained gas braai rewards you with reliable ignition, even heat, and years of good braai evenings. If yours needs more than a clean, or you’re ready to upgrade, it’s worth browsing premium braai brands worth investing in and Firehouse’s gas braai range, or booking a service check if something still isn’t lighting the way it should.